Schwechten over damper piano converted to an under damper piano

Swollen Leads on Over Damper action
This blog is for general information for piano technicians and the general public that have an interest in having a conversion done on a Bird Cage or Over Damper Conversion to Under Damper Action piano. This work should only be undertaken by a trained ARPT registered Master piano Technician.
What is the difference between an Over Damper or Bird Cage piano and a modern Under Damper piano action?
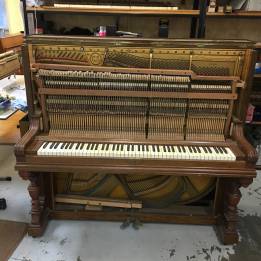
The Damper is the part of the piano action that stops the string from ringing on when the finger is released from the key. In the picture to the left there is a mechanism above the hammers. This is called Over Damper.
Because there is little space between the strike point and the end of the string the damper has little purchase on the string to stop it from ringing especially in the section past the second break. Also Over Dampers give trouble in the bass section rubbing together and sticking.
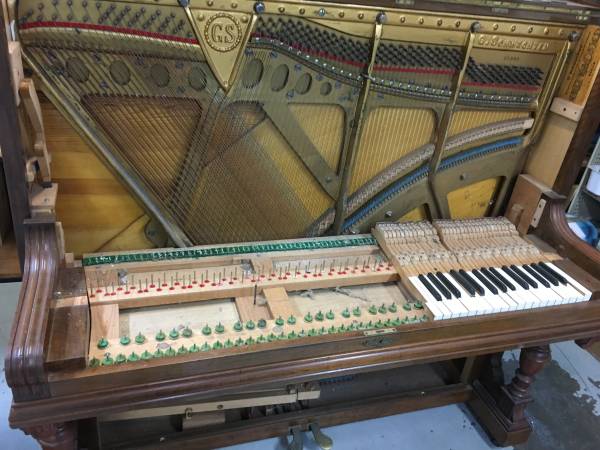
The Under Damper action has the dampers under the hammers as you can see in the photos of the new Wessel Nickle & Gross action. So the Under Dampers touch the string near the middle of the string giving greater purchase on the vibrating string to stop the string ringing. This is why all modern pianos are made with Under Damper Actions
Overview
I did this rebuild in December 2017. I don’t know anybody that has done this type of conversion in Western Australia or even Australia. The major issues that stop technicians doing this type of conversion is the crossover of the Bass strings over the treble strings is a lot higher than on the traditional under damper piano. I had to use and creative thinking to overcome this problem. I had a great deal of help from Bruce Clark WNG America. The under damper action used was a Wessel Nickle & Gross from America. See there web page at http://wessellnickelandgross.com
History
This Swechten piano has been in my customers family for many years and was a very loved instrument.
We had 3 options.
- Rebuild the action and end up with a playable piano with the usual over damper problems.
- Convert to an under damper.
- Or use the piano as a photo holder as it has been for the past 20 years.
I guess we can start this bog by looking a YouTube video of the finished product.
So there you go. Well worth the exercise.
If you have a loved instrument you want to be made playable again in WA then give me a call at Gary Bailey ARPT Piano Magic 08 9477 5866
Ok into the nitty-gritty. How did I do it?
We picked the piano up from my customers home in Collie and transported it to my workshop at Piano Magic Belmont.
the first job was to remove the action and do a Scale Stick to send to Wessel Nickle & Gross. They use this to manufacture the new action. We then had to wait for the new action to arrive and pay the GST before the carrier would deliver.
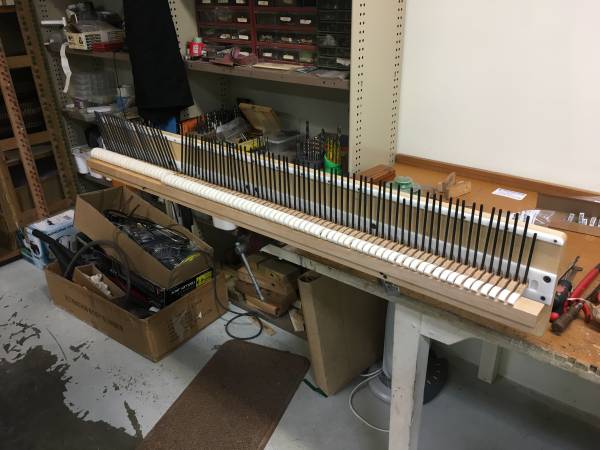
Stripping the piano
Stripping piano parts.
The next was to remove the action and all the supports the keys and key frame. The keys went into the workshop to be Buffed and the key frame stripped of all felt. Cleaned and set up with new felt giving me the right depths of touch ready for regulation. The pedal rods were removed as well. These were in the wrong position for the new action.

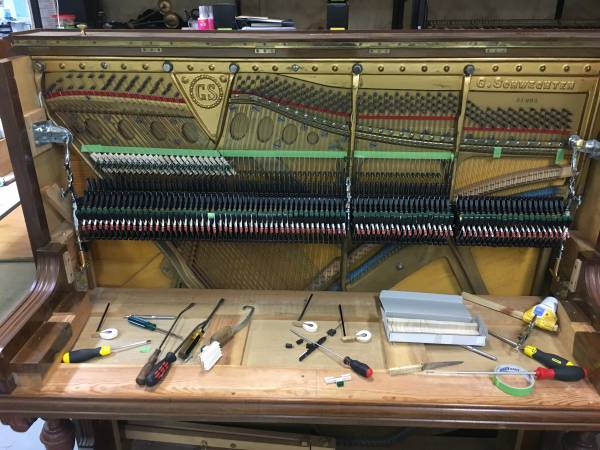
Ready for installation.
Now we are ready for the install.

Remove action parts for fitting jig.
This is the new action and it comes as an action rail, with supports, wippens, damper levers and hammer butts. The rest I have to fit to match the piano. The action parts opposite the supports of the key bed are removed to enable the fitting the WNG support jig to put in place.

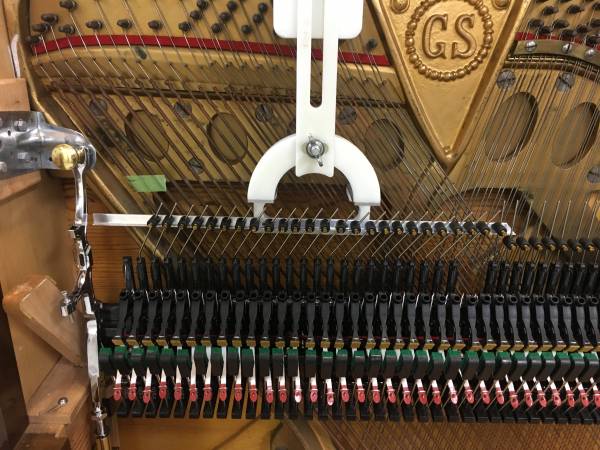
Action sitting in alignment cradle.
The action alignment is determined by the guides placed at C88 and A1 using the old strike points on the string otherwise this need to be measured. Using the WNG fitting cradle.


Align action to C88 in the Treble.
Align action to old strike point in the Bass.
Sorting the damper problem
Opps damper in wrong position.
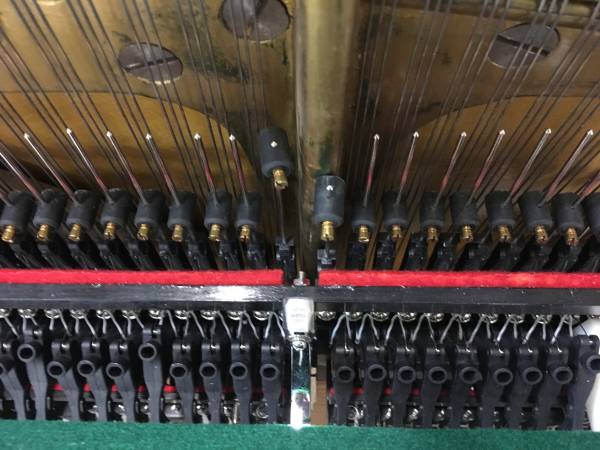
Once the action is in the right position the first obstacle needed to be addressed was the Damper sitting on the frame.
The scale stick tells WNG where to put the wippen and hammer but and the damper aligns to the wippen through the lifting spoon. This is at 45% to the Wippen so the bass Dampers are to the right of the wippen and the Treble are to the right except after the break where they put them back to the left.
This left one damper lever sitting on the frame. On a normal wooden action this is a major problem but WNG have enabled the spoon to run in either direction.
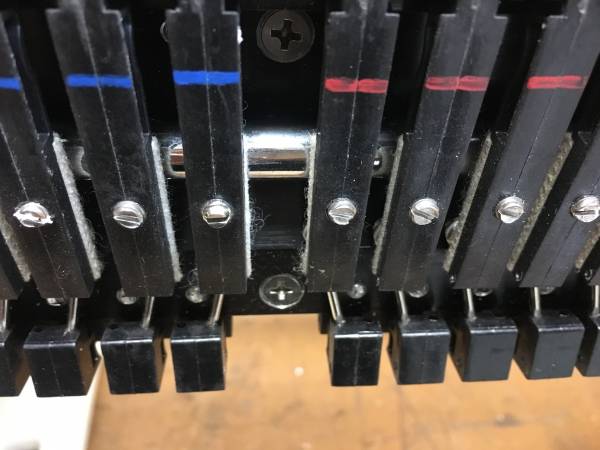
1st blue damper to be moved.
I removed the first Blue damper and set the spoons so they operated the damper on the left instead of the right in this picture and all was well. Brilliant designing by Bruce Clark. The holes were already in the wippen for the change. Fantastic. I drilled a new hole in the main frame for the damper at the end of the blue section so I had the same number of dampers. Problem solved.
Then back to supporting the action

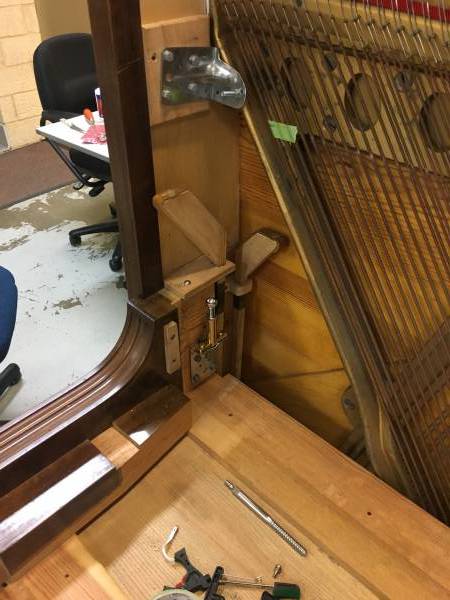
Action supports fitted bottom and top, of the action stands.
I found some brackets at the hardware and decided to secure the action to the cheek and side of the piano instead of the normal, sitting on the key bed and bolt through the frame to the tuning plank. The size of the piano was an issue here as the new action didn’t have a prolong on the wippen so I knew I had to make up some space between the key and the wippen. the Prolong is the piece of wood in the 1st picture between the key and the bottom of the Wippen.
Sorting the pedal rods
Damper soft pedal rods realigned
Boy this was a challenge. Normally a hole is drilled through the key bed to accommodate the soft pedal rod however the action was sitting up against the left cheek. So I used the normal damper lift rod for the soft pedal so I reached over the cheek and the soft pedal on the damper lift so the holding bracket fixed to the side not the Sound Board. Worked a treat.
Bending the Bass Damper wires

Damper set up. Bending the Bass wires.
The bass damper wires needed to be bent to the right so the damper head would align with the string.
Barrels lined with string using WNG cradle
Damper wires bent and the damper Barrels ready for the damper head fitting. the WNG Cradle holds the Damper Barrels in place as the wire is bent.
Cross over Dampers removed.
Bass dampers fitted.
Bass damper heads fitted. This part is straightforward.
I like to put masking tape on the strings so the dampers are placed in a straight line. I’m a bit anal about things being straight.
Treble dampers installed.
Treble dampers fitted. The end section doesn’t have dampers on any piano. This is because the upper treble notes have a very fast decay. When the note is played the sound stops quickly.
Fitting the cross over Dampers

Fitting cross over Dampers.
The issue I had here was to fit the cross over dampers. I had to have the first 2 crossover dampers piggy back over the bass dampers. The first damper after the break has to be very small and so this note had a harmonic. I did fit a fly damper over the hammer to stop this harmonic.
Fitting the Hammers
So now we get to fitting the hammers. First we need to mark the strike point on A1, No 28 which is the end of the bass section, the 1st level hammer after the break, Number 72 and Number 88.
Gluing hammer shanks to heads.
Now I glue the hammer shanks into the hammers making sure the hammer angle is consistent No 1 to 88. This WNG jig does it well.

Trimming the shanks.
I then trim the hammer shank length using the samples I have previously set as guides. This job made easy using the WNG Hammer Shank trim jig.
See the No 72 and No 88 trimmed. These are the most important to get right. As this can affect the tone in the this section. The other sections are not so critical.

Hammers in action to be aligned.
Then just placed the hammers in the Hammer Butts and was going home to bed. Ha by chance I just aligned a couple of hammers and found the glue from gluing the hammer heads had run down the hollow shanks and was gluing the hammers where they were. PANIC. Yes.
I spent the next hour spacing the hammers then went home to bed. Sorry no photo.
Notice the 5 hammers on the green board to be fitted.

These 5 hammers needed to be fitted individually to miss the dampers sitting under them. It is very important to have clearance between the Hammer and Damper.
Fitting the Key Capstan

Filling the gap between key and action.
Setting up the Key Capstan was another challenge.
I had a huge gap to fill in. I asked Bruce to supply the deepest wippen heal and they suppled a tall Capstan.
I made up blocks to fill the gap. I used pine to keep the weight down. Then reinforces around the Capstan wire with CA glue. Removing the old adjusters and not having a Prolong kept the key weight close to original.

Blocks and Capstans fitted to keys.
While these are drying I fitted the wippen heals.

Fitting tall wippen heals.
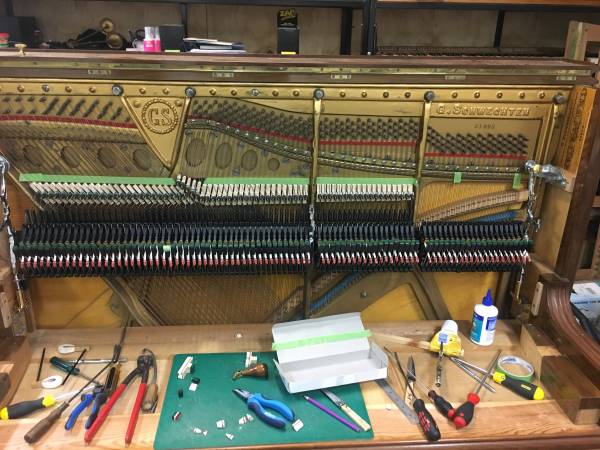
Almost done

New action finished
Now I put the action in and did a full regulation. Regulation adjusts each of the notes to play nicely.
Time frame
The new WNG action was ordered in early September with the posting of the Scale Stick to WNG.
We then had to wait for the action to be made and this took longer because of the converting from Over Damper to Under Damper. Not sure this wasn’t the first on they did.
I had the action by early December and started the fitting on the 18th December 2017. The piano was finished on the 22nd December and delivered on the 23rd December 2017. Ready for Christmas.
This is the 3rd WNG upright action I have fitted and they get easier as I go.
My client has requested us the keep the financial costs to ourselves however I would be happy to give an estimate on any conversion you require.
I am very happy with the result and would do another in a flash. I’m happy to thank orders from Piano Tuners or the general public all over Australia.
I hope you enjoyed this blog.
If you would like more info, please contact Gary Bailey ARPT at Piano Magic on 08 9477 5866, or complete the contact form and we will get back to you.